Administering JMS resources in IBM MQ
Introduction
JMS
administration for the IBM MQ administrator requires the JMSAdmin utility or IBM MQ Explorer and
an understanding of the JNDI namespace. In this exercise, you create a file
system-based JNDI namespace, define a queue connection factory, and define
destination objects. You then run the IBM MQ JmsJndiProducer sample program to place a JMS
message onto a destination and then retrieve that message by using the JmsJndiConsumer sample program. The JmsJndiProducer sample program generates a
random “lucky-number” and places a message on the specified destination. It
also displays JMS RFH2 data.
The
JmsJndiConsumer
sample
program gets a JMS message off the specified QCF/Destination and displays the
RFH2 data and the “lucky-number” that the JmsJndiProducer sample program generates.
The JMS sample programs are in the C:\Program
Files\WebSphere MQ\Tools\jms\samples directory.
CLASSPATH=mqinst\java\lib\com.ibm.mqjms.jar;mqinst\tools\jms\samples
Where mqinst is the IBM MQ installation directory.
•Windows
PATH contains path to Java runtime file: C:\Program Files\IBM\WebSphere
MQ\java\jre\bin

STEP 1:-
In Step 1 we are going to create
1)A file system based JNDI Property
2)Queue Connection Factory
3)One Destination defination for the local queue.
STEP 2:-
Start QM1 Queue manager

Step 3:-
create a Local Queue by name QL.A

Step 4:-
Create a directory for your
JNDI FSContext namespace repository.
Using Windows Explorer,
create a folder that is named C:\JMSContext.

Step 5:-
Use IBM MQ Explorer to configure
the JMS administered object for the JNDI namespace.
In the dialog box that is
displayed, select File System and choose the C:\JMSContext directory
for the Bindings directory. __ a.
Right-click JMS Administered Objects and click Add Initial Context.


Click Next. Ensure that the Connect
immediately on finish check box is selected.

Step 6:-
Click Finish. The new
initial context appears under the JMS Administered Objects folder in the
IBM MQ Explorer Navigator.
Use IBM MQ Explorer to
define a queue connection factory.
a. Expand the initial context object that you created in Step 4 under
the JMS
Administered Objects folder in
the IBM MQ Explorer Navigator.
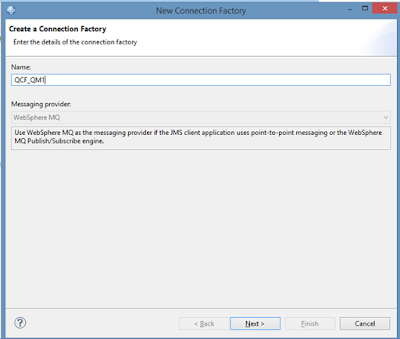
b. Right-click Connection Factories and click New > Connection
Factory.

c. Name the new connection factory QCF_QM1 and then click Next.


d. For the Type, select Queue Connection Factory. Click Next.

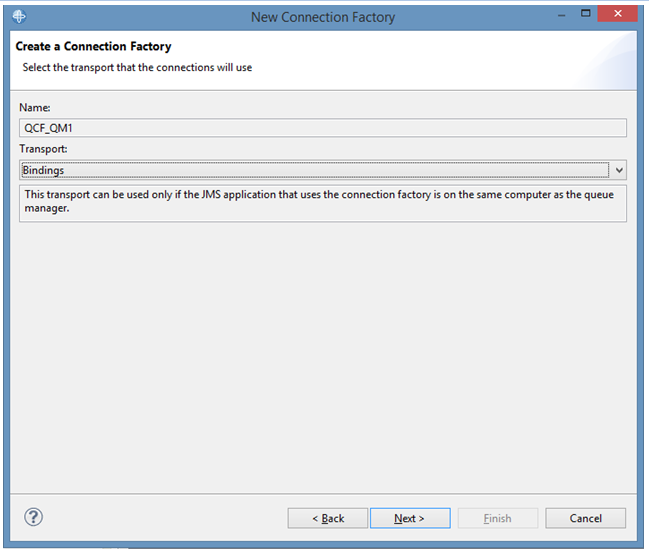
e. Verify that the Transport is set to Bindings. Click Next.
f. Click Next to proceed to the Change properties window.

g. Click Connection to display the connection properties.
h. For the Base Queue Manager, select QM1.

I. Click Finish. The new
connection factory, QCF_QM1 should appear in the Connection Factories
Content view

STEP 7:-
Use IBM MQ Explorer to define a destination
administered object for QL.A.
a. Under the initial context folder in the IBM MQ Explorer Navigator,
right-click
Destinations and click New
> Destination.

b. Name the new destination DEST_QL.A

c. Set the type as Queue and then click Next.
d. Click Next again.
e. In the Change properties window, select QL.A for Queue.

f. Click Finish. The
destination DEST_QL.A should appear in the Destinations content view.

STEP 8:-
Run the JmsJndiConsumer sample.
You must run the JMS samples in a command
prompt. The samples are in the C:\Program Files\IBM\WebSphere
MQ\tools\jms\samples directory.
a. Java is in C:\Program Files\IBM\WebSphere MQ\Java\jre\bin\. This
folder should already be in the path.
Make sure that Java is found before
proceeding.
Type: java
b. Run the batch file cp.bat in the C:\labfiles\Lab09 directory to set
the Windows class path.
c. Run the JmsJndiProducer sample program. The syntax is:
java JmsJndiProducer -i
file:PathName -c <QcfName> -d <Destination>
Type:
java JmsJndiProducer -i
file:/C:/JMSContext -c QCF_QM1 -d DEST_QL.A
Your results should appear
similar to the following example:

d. Note the lucky number that the JmsJndiProducer generated
for you.
Using IBM MQ
Explorer, verify that a message was put on the queue QL.A on QM1.
STEP 9:-
Browse the message and view the message data.

STEP 10:-
Verify that the message was taken off the queue QL.A on QM1.
No comments:
Post a Comment